Content: Explain why you’d use these. Show the “before” (useEffect mess) and “after” (useQuery simplicity). Show the “before” (useContext problem) and “after” (Zustand‘s surgical updates). Build the shopping cart and show how these three libraries work together.
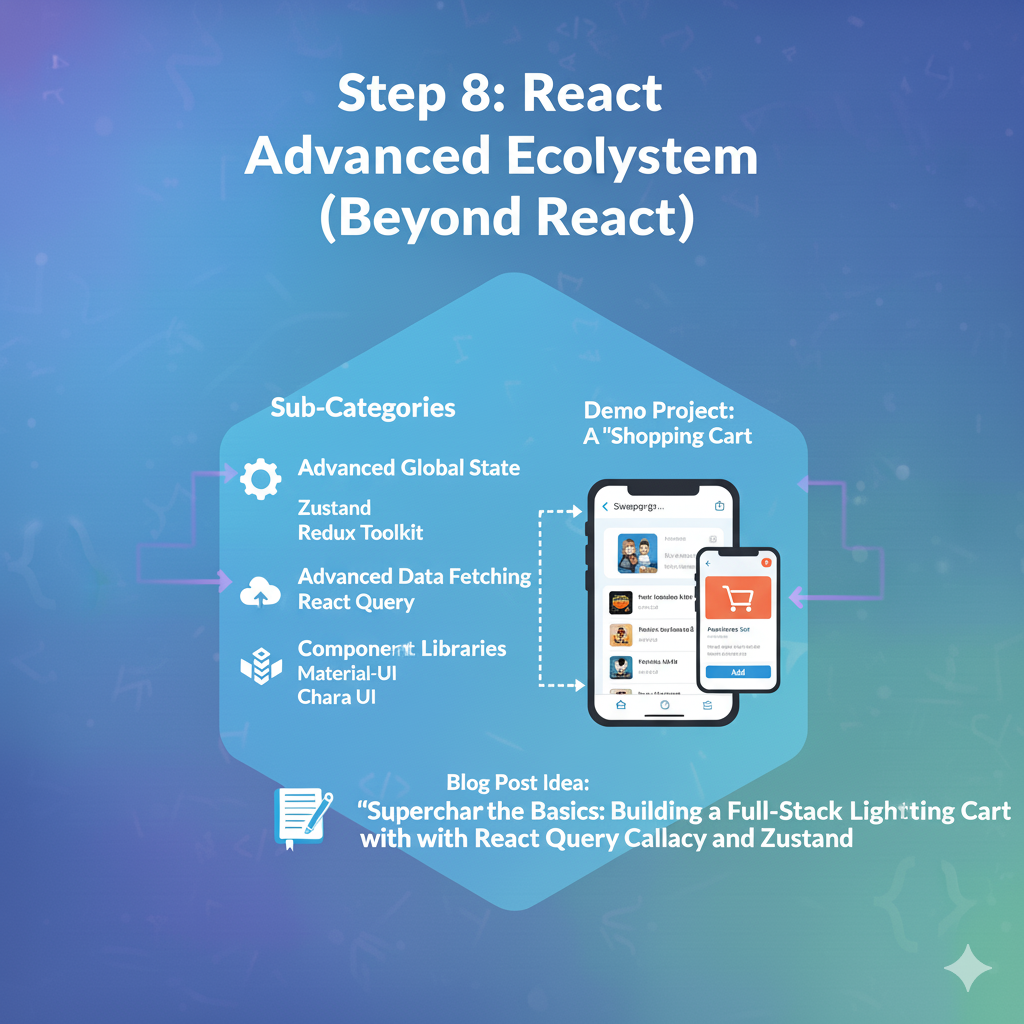
This is the final, and most “real-world,” step. This is where you learn to stop building everything from scratch and start using the powerful, battle-tested tools that the React community has built.
Goal: Integrate powerful, external libraries to handle complex problems (global state, data fetching) and build UIs faster, so you can focus on building features, not infrastructure.
1. 🧠 Advanced Global State (Zustand & Redux)
In Step 6, you learned to use useContext to avoid “prop drilling.” This is great for simple state (like a theme).
The Problem: useContext has a performance issue. When any part of the context value changes, every single component consuming that context re-renders. If your context holds a large object (like user, cart, settings), and you only change one small part, everything re-renders. This can make your app slow.
The Solution: Dedicated state management libraries. These are highly optimized to solve this problem.
a) Zustand (The Simple, Modern Choice)
- Philosophy: Minimal, simple, and fast. It’s often called “Redux-lite.” It’s just a hook.
- How it Works: You create a “store” (which is just a custom hook). Components can “subscribe” to this store and, more importantly, they can select only the exact piece of state they need.
- The Magic: If a component only subscribes to
state.cartCount, it will only re-render whencartCountchanges. It won’t re-render ifstate.userorstate.themechanges. This solves theuseContextproblem.
JavaScript
// 1. Create your store (src/store/cartStore.js)
import { create } from 'zustand'

export const useCartStore = create((set) => ({
  // State
  items: [],

  // Actions
  addToCart: (product) => set((state) => ({
    items: [...state.items, product]
  })),

  clearCart: () => set({ items: [] }),
}))

// 2. Use it in any component (src/components/ProductCard.jsx)
import { useCartStore } from '../store/cartStore'

function ProductCard({ product }) {
  // We select *only* the addToCart function.
  // This component will never re-render when 'items' changes!
  const addToCart = useCartStore((state) => state.addToCart)

  return <button onClick={() => addToCart(product)}>Add to Cart</button>
}

// 3. Use it in another component (src/components/CartIcon.jsx)
import { useCartStore } from '../store/cartStore'

function CartIcon() {
  // We select *only* the number of items.
  // This component will *only* re-render when the item count changes.
  const itemCount = useCartStore((state) => state.items.length)

  return <div>Cart: {itemCount}</div>
}
b) Redux / Redux Toolkit (The Powerful, Industry Standard)
- Philosophy: A strict, centralized, and predictable way to manage your entire app’s state. It’s the standard for huge, complex applications.
- Core Concepts:
- Store: A single object that holds your entire app’s state.
- Actions: Plain objects describing what happened (e.g.,
{ type: 'cart/addItem', payload: product }). - Reducers: Pure functions that take the current
stateand anactionand return the new state.
- Why is it so complex? This strict “one-way data flow” (Action -> Reducer -> Store -> UI) makes debugging large apps 100x easier. With Redux DevTools, you can “time travel” by rewinding actions to see exactly when and why your state changed.
- Redux Toolkit (RTK): This is the modern, official way to use Redux. It removes 90% of the “boilerplate” (complex setup) and is what you should learn.
Verdict: Start with Zustand. It will solve 95% of your problems. Learn Redux Toolkit when you join a large team or find your state logic is becoming extremely complex.
2. 🧠 Advanced Data Fetching (React Query / TanStack Query)
In Step 4, you learned to fetch data with useEffect and useState.
The Problem: This is so much work. For every API call, you have to manually manage data, isLoading, and error states. What about…
- Caching? If you leave the page and come back, you re-fetch, even if the data hasn’t changed.
- Background Updates? When a user tabs back to your app, the data is probably stale.
- Mutations? When you
POSTa new item, how do you automatically update the list?
The Solution: React Query (now TanStack Query). This library is a masterpiece. It’s not a data fetching library; it’s a server-state management library.
- Philosophy: It treats your API data as “server state” and handles all the caching, re-fetching, and state management for you.
useQuery(for GET): You give it a unique key and a fetch function. It gives you all the states.
JavaScript
// The OLD way (Step 4)
function ProductsList() {
  const [data, setData] = useState(null);
  const [isLoading, setIsLoading] = useState(true);
  const [error, setError] = useState(null);

  useEffect(() => {
    async function fetchData() {
      try {
        const res = await fetch('...');
        const json = await res.json();
        setData(json);
      } catch (e) { setError(e); }
      finally { setIsLoading(false); }
    }
    fetchData();
  }, []);

  if (isLoading) return <p>Loading...</p>
  // ...
}

// The NEW way (React Query)
import { useQuery } from '@tanstack/react-query'

function ProductsList() {
  const { data, isLoading, isError, error } = useQuery({
    queryKey: ['products'], // 1. A unique key for this data
    queryFn: () => fetch('...').then(res => res.json()) // 2. Your fetch function
  })

  if (isLoading) return <p>Loading...</p>
  if (isError) return <p>Error: {error.message}</p>

  return <ul>{data.map(product => ...)}</ul>
}
All that useEffect code is gone! React Query now automatically gives you:
isLoading,isError,datastates.- Caching: If you run this
useQueryin another component, it will not re-fetch; it will use the cache. - Re-fetch on Focus: When the user leaves and comes back, it re-fetches in the background.
useMutation(for POST, PUT, DELETE): A hook that lets you easily update data and then “invalidate” youruseQuerykeys, forcing a fresh, optimized re-fetch.
3. 🧠 Component Libraries & Styling
The Problem: Writing all your CSS from scratch is slow. You’re re-inventing the button, modal, and grid for every project.
The Solution: Use a pre-built system.
a) Component Libraries (e.g., Material-UI (MUI), Chakra UI)
- What it is: A giant box of pre-built, production-ready React components (
<Button>,<Modal>,<Grid>,<DatePicker>). - Pros: Incredibly fast. You can build a complex, professional-looking UI in hours. Handles accessibility and responsiveness for you.
- Cons: Your app might look “cookie-cutter” (like every other app using that library).
JavaScript
// Example with Material-UI (MUI)
import { Button, Alert, Slider } from '@mui/material'

function MyForm() {
  return (
    <>
      <Alert severity="success">Profile updated!</Alert>
      <Slider defaultValue={30} />
      <Button variant="contained">Submit</Button>
    </>
  )
}
b) Utility-First CSS (e.g., Tailwind CSS)
- What it is: A completely different approach. It’s not components. It’s a CSS framework that gives you thousands of tiny “utility” classes.
- Pros: Extremely fast for building custom designs. You never leave your JSX file. You don’t have to invent CSS class names.
- Cons: Your JSX can look “messy” at first.
JavaScript
// Example with Tailwind CSS
// No separate .css file needed!
function MyButton() {
  return (
    <button className="bg-blue-500 hover:bg-blue-700 text-white font-bold py-2 px-4 rounded">
      Click Me
    </button>
  )
}
// 'bg-blue-500' means background-color: blue
// 'hover:bg-blue-700' means on:hover, make it darker
// 'py-2' means padding-top/bottom
// 'px-4' means padding-left/right
4. 🚀 Demo Project: A “Shopping Cart”
This is the perfect project to combine all three.
- Component Library: Use Chakra UI or MUI to build the UI (the
<Grid>for products, the<Button>, the<Modal>for the cart). This lets you build it fast. - React Query:
- Use
useQueryto fetch all the products from a public API (e.g.,fakestoreapi.com). - Display a loading spinner and error message.
- Use
- Zustand:
- Create a
useCartStoreto manage the global cart state. - The store will have an
itemsarray and anaddToCartfunction. - Your
ProductCardcomponent will call theaddToCartfunction. - Your
NavBarcomponent will read theitems.lengthfrom the store to show a cart icon with a number.
- Create a
This project proves you can build complex, professional applications by standing on the shoulders of giants.